
The amount of sensitive data we store and use daily in the digital world is increasing rapidly. From financial data to e-wallets, and even information about remote work, the risks of ransomware and other attacks have never been so prevalent. The best way to protect data is to encrypt it so only the person with the decryption key can access it. Fortunately for all Mac users, Apple provides users with an extremely powerful encryption tool. But what is FileVault, anyway? Read on to learn everything you need to know about FileVault on Mac.
What is FileVault on Mac, and how does it work?
FileVault is designed to encode all the information stored on your Mac. FileVault uses the AES-XTS data encryption algorithm to protect full volumes on internal and removable storage devices. This prevents anyone from accessing your files. When you are using it, information can only be read if you enter your proper login access credentials.

You don’t have to be an expert to protect your Mac
On a Mac, FileVault is offered as an encryption tool that encrypts what you store and create on your device. FileVault also comes built into the hardware on iPhones and iPads, which means that, unlike on a Mac, the feature cannot be turned on and off. Your data is already encrypted automatically by default if you have an iMac Pro or any other Mac with an Apple T2 Security Chip. However, you can also turn on FileVault to further strengthen your encryption.
Only an administrator can turn FileVault on or off. When you turn on FileVault, you are given options to unlock (or decrypt) the data to use the computer as usual. These options use an iCloud account with its password or a recovery key.
Should I be using FileVault disk encryption?
Is there any reason you should disable FileVault? While many tools, services, and software are available to encrypt your data, FileVault was specially developed by Apple for Mac encryption. This means that the feature has intimate knowledge of what it takes to encrypt and decrypt data on a Mac, making it an excellent choice.
In addition, FileVault uses full-disk XTS-AES-128 encryption with a 256-bit key. This is very robust encryption. The FileVault disk encryption on your Mac is virtually impossible to hack due to the number of combinations required to crack it. Roughly speaking, the fastest computer in the world would take several billion years to guess its way through brute force into a system using AES-128 encryption, even when giving a million keys per second.
Mac and similar FileVault features on iPhone have gained a strong reputation for security. Reports assure that government supercomputers and the FBI have unsuccessfully tried to crack these keys.
Does FileVault affect the performance of a Mac?
FileVault will work fairly quickly and take up few computer resources if you’re running a newer Mac. In the newest Macs, like iMac Pro and others with M1 or T2 chips, the initial first use of FileVault will encrypt the disc almost instantly and later do live encryption on the go, taking up minimal computing resources. Simply put, you will not even notice FileVault is working in the background.
In older Macs, however, things can get slower. Reports claim that FileVault can significantly decrease disk performance in all old Mac models, sometimes cutting disk read times up to 20%. Additionally, it can take anything from 10 to 5 hours or more to encrypt data on an old Mac, depending on the state of the computer and the amount of data in it.
Does FileVault have an impact on a Mac’s battery life?
FileVault does not have an impact on a Mac’s battery life. Many modern Macs built with silicon chips or T2 chips are designed to take on extra tools like encryption without affecting the battery life of the device. Even the slightly older Intel Macs are able to handle FileVault without slowing down the system.
When you set up FileVault for the first time, you will notice a slight increase in CPU as it begins to encrypt your system. But once it has finished setting up, the effect on your Mac’s battery life is virtually nonexistent.
How to use FileVault to protect your data
One of the benefits of FileVault is that it is an intuitive security tool that requires absolutely no knowledge to use. The encryption of all files and data is automatic and takes place in real time. All you have to do is enable FileVault, and the tool will take care of the rest. You can use your computer as you would normally, and if for some reason you wish to pause or stop FileVault from encrypting your files, you can do that as well.
One important thing to remember is that FileVault requires the use of a password or key, so when setting it up, be sure to save your password or recovery key in a safe location. Other than that, FileVault is an autonomous encryption tool that requires no user intervention.
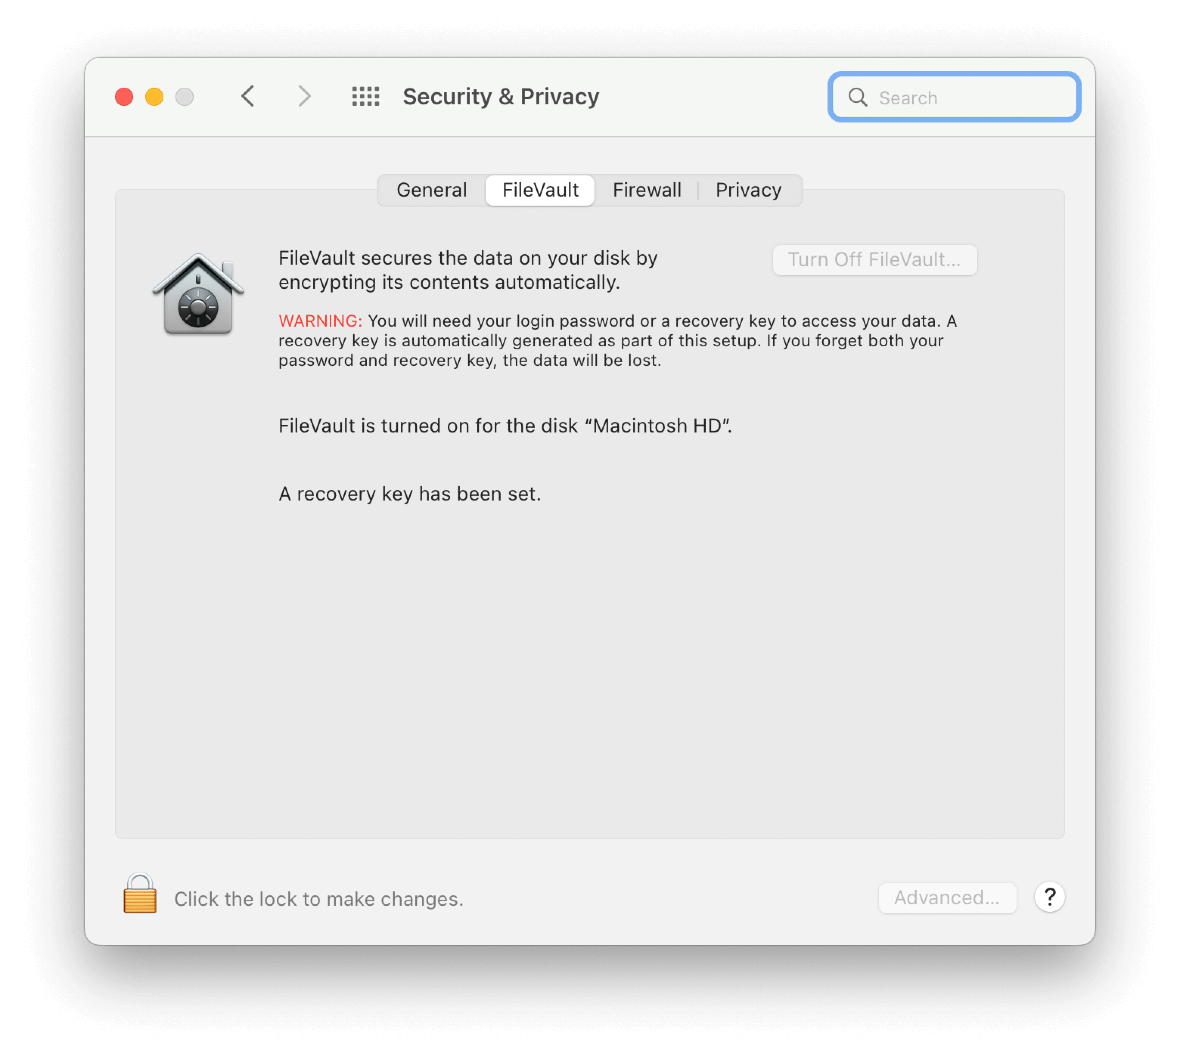
How to check if you have FileVault turned on
Checking whether FileVault is on or off is very easy and can be done in three simple steps.
To check FileVault status:
- Click on the Apple menu and select System Preferences.
- Select Security & Privacy.
- Click the FileVault tab and check the status.
How to enable FileVault
This powerful encryption tool is available right at your fingertips, and you can use it by following four simple steps.
To activate Filevault:
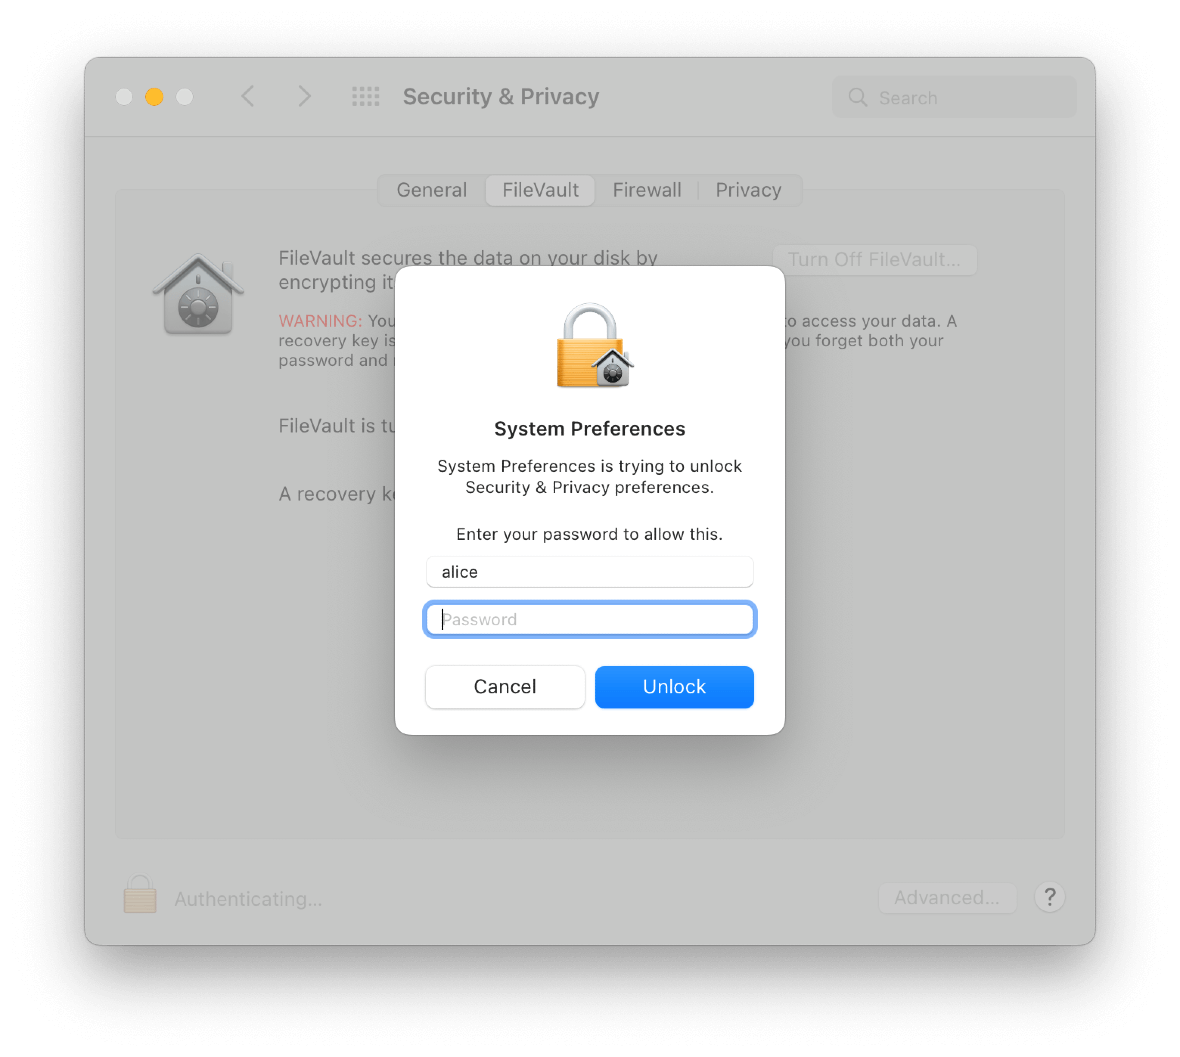
- Choose the Apple menu, then System Preferences, and select Security & Privacy, then FileVault.
- Click on the Lock icon and enter your administrator login and password. Then select Turn On FileVault and enter your password again if prompted.
- Now select how you want to unlock the disk. You will be given two options:
- iCloud account: Click “Allow my iCloud account to unlock my disk” if you already use iCloud. Click “Set up my iCloud account to reset my password” if you don’t already use iCloud.
- Recovery key: Click “Create a recovery key and do not use my iCloud account.” Write down the recovery key and keep it in a safe place.
- Finally, select Continue and follow the steps to activate FileVault.
Keep in mind that this feature does not encrypt in Sleep mode. Your Mac also needs to be plugged in, so if you get an error while encrypting, ensure that your Mac is properly connected to power. If there are several accounts on your Mac, you might see a message indicating that users must type in their passwords before they can unlock the disk. For each user, click the Enable User button and enter the user’s password. User accounts that you add after turning on FileVault are automatically enabled.
How to disable FileVault on Mac
Turning off FileVault is not recommended once it has been enabled. FileVault provides an invaluable layer of protection to your Mac, so turning off FileVault will leave your system and files unprotected.
If you nevertheless decide to turn off FileVault, first back up all of your essential files to either iCloud or Time Machine.
Here’s how to turn off FileVault:
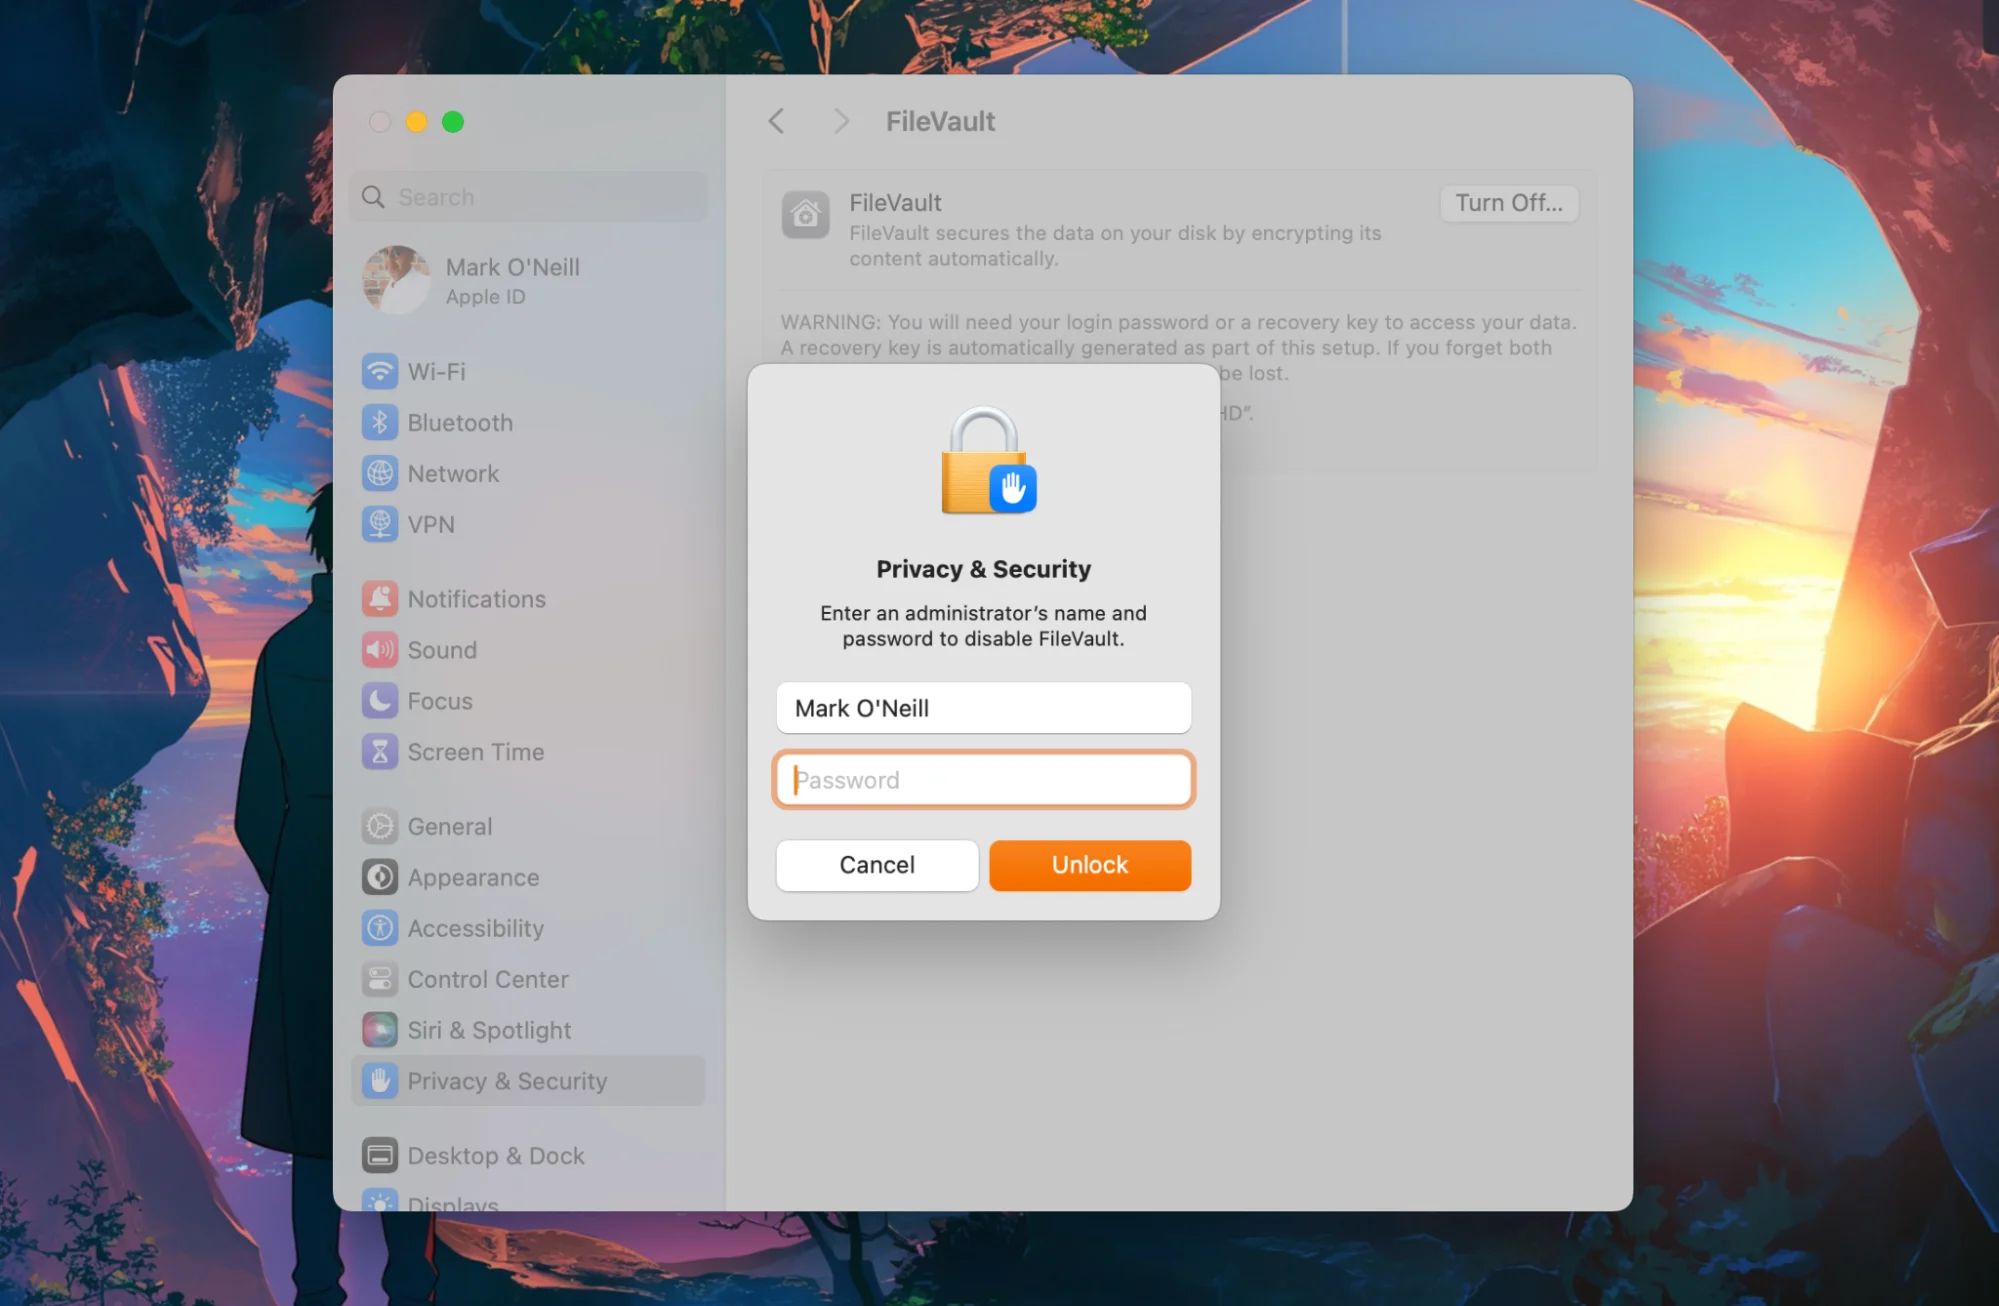
Step 1: Go to System Settings > Privacy & Security > FileVault.
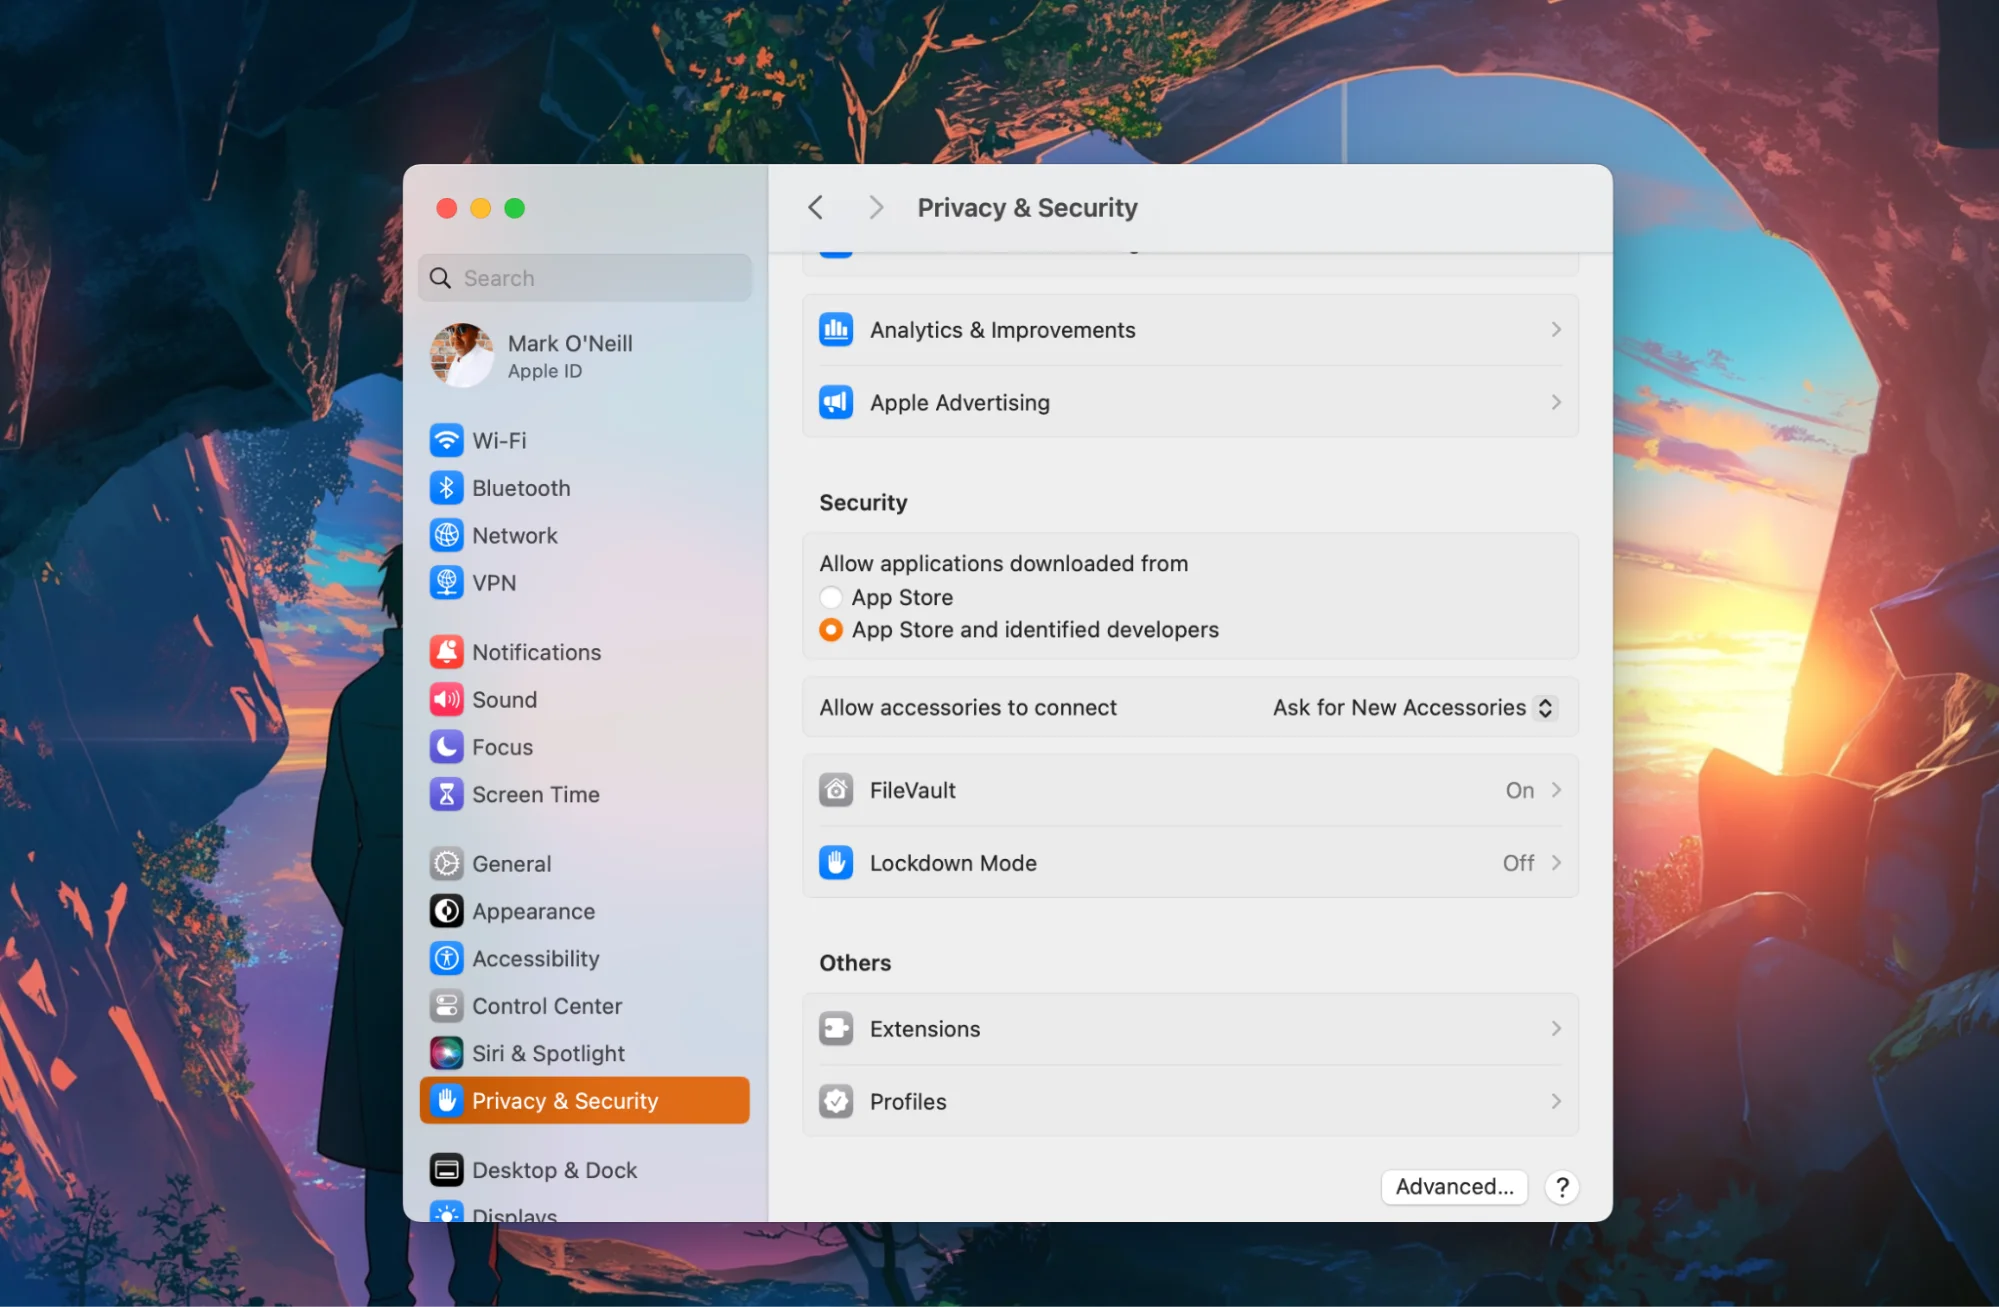
Step 2: Click “Turn Off.”
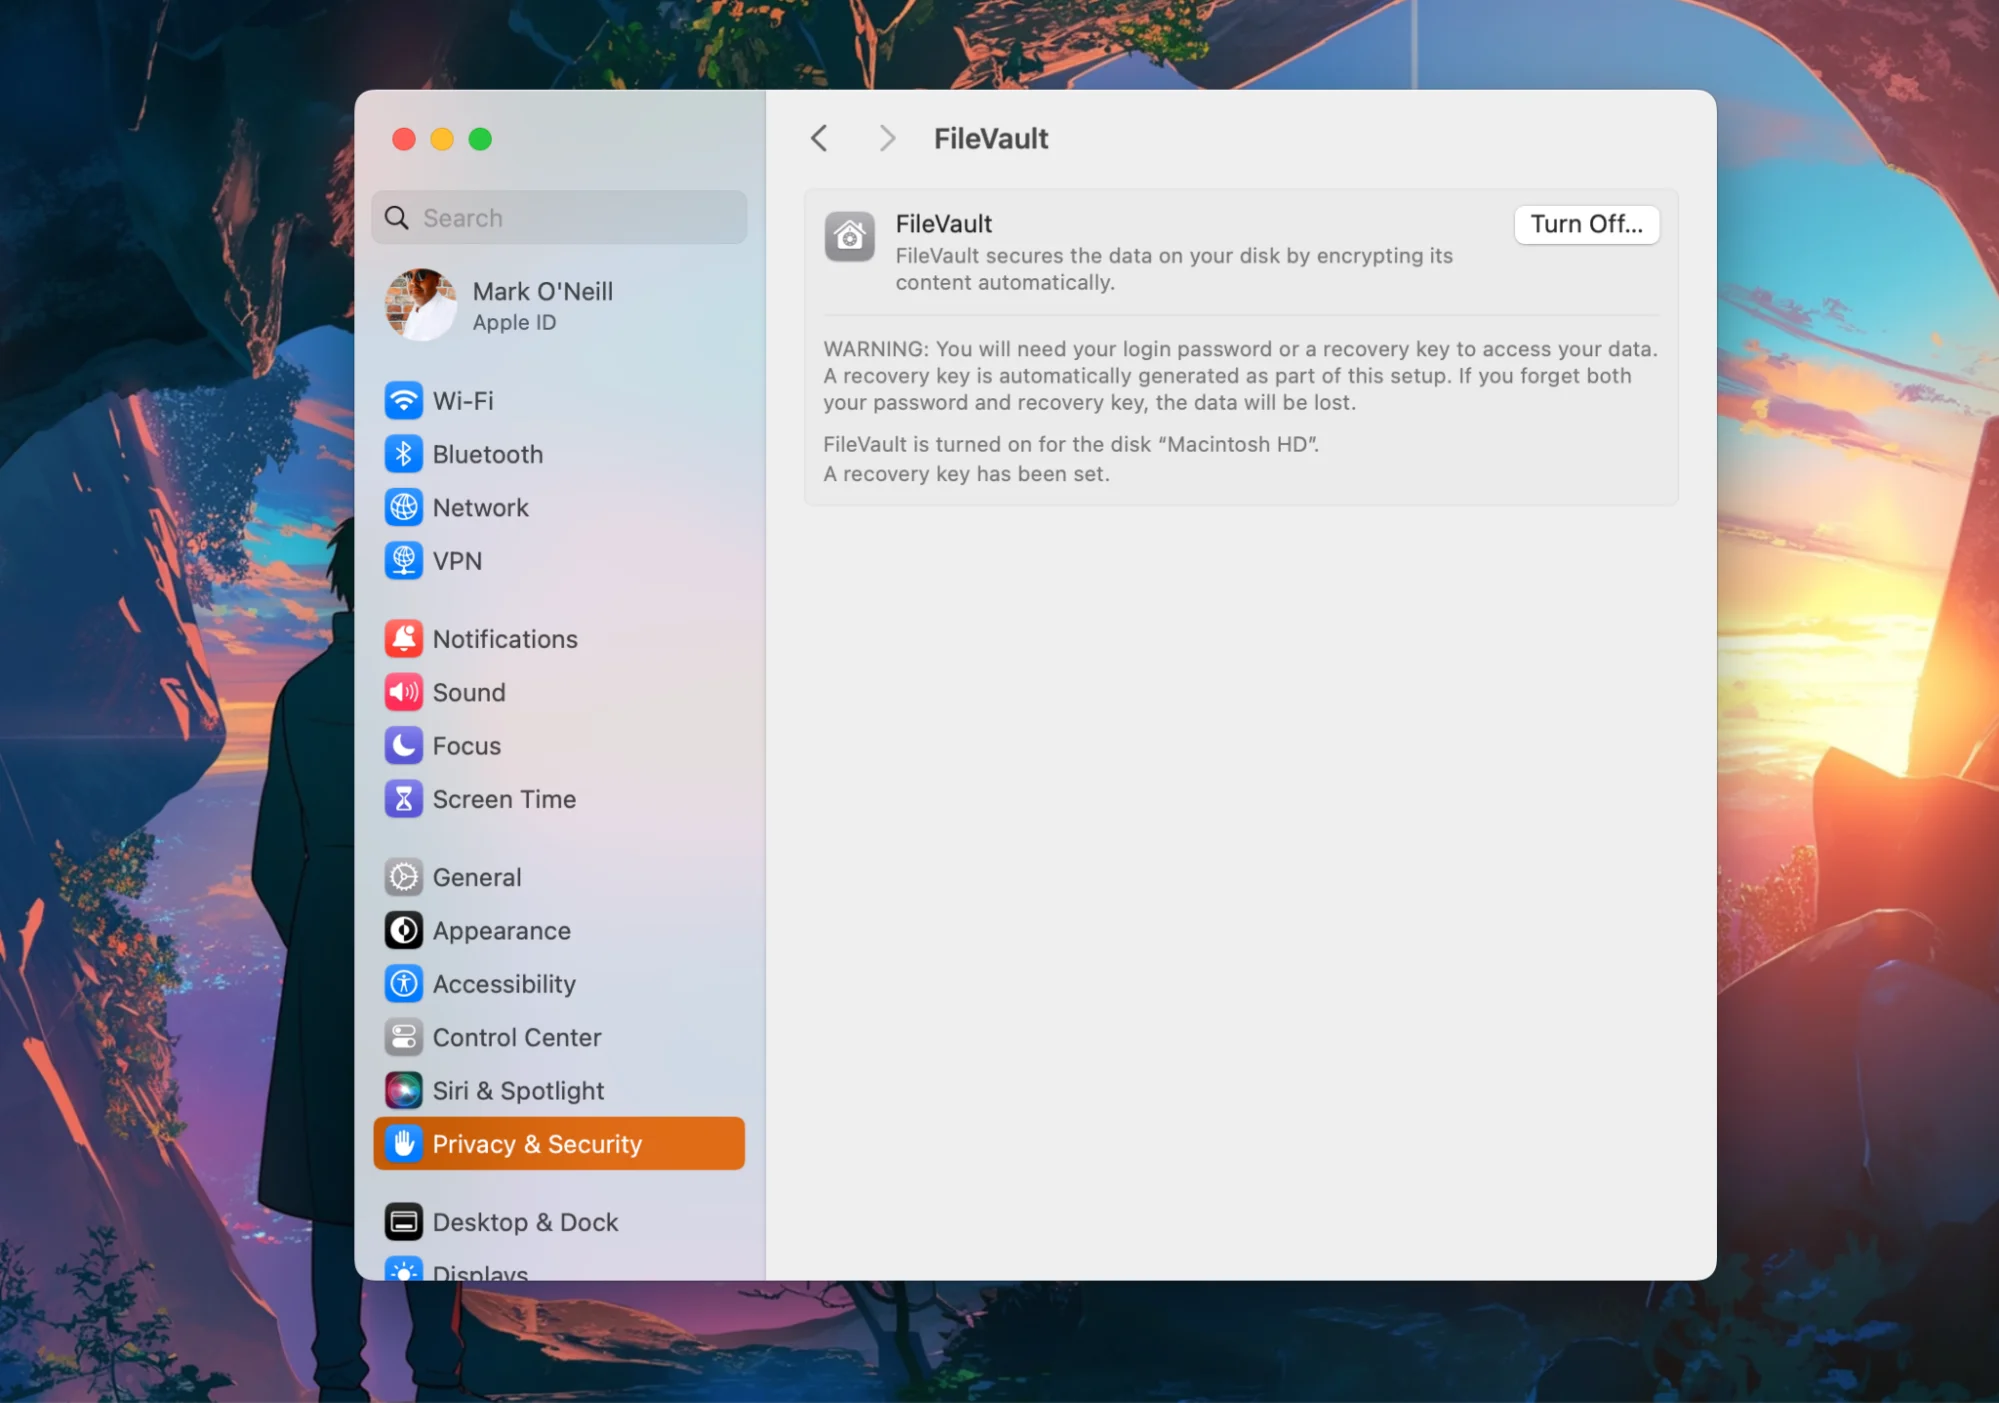
Step 3: Enter your administrator name and password.
FileVault will now start to decrypt and eventually turn off. How long this takes is hard to say. Newer computers with the silicon or T2 chip will go faster. Older Intel Macs will go slightly slower. It also depends on how large the encrypted disk is.
To help improve decrypting speed, close down all other running apps, especially your browser. Leave the computer alone and let it do its thing.
What happens if I turn off FileVault on Mac?
The purpose of FileVault is to encrypt every file on your startup disk. Once you completely shut down your Mac, FileVault locks your files up tight. This makes the startup disk contents extremely secure from prying eyes.
If you turn off FileVault, you immediately lose that encryption, and your files are suddenly vulnerable to anyone with physical access to your machine. There’s absolutely no upside to turning off FileVault.
How long does it take to encrypt a MacBook?
As previously mentioned, the encryption of a MacBook will depend on the model, year, and amount of data on it. Newer MacBook models with little to no data stored will execute encryption almost instantly, while the same process in older models with significant amounts of data can take hours.
Apple does not provide a specific timeframe for encryption, probably due to the many variables involved in the process. One thing is sure — newer chips have accelerated Apple’s encryption speed significantly.
How can you find the FileVault recovery key on a Mac?
The short answer to the question above is that you can’t find your FileVault key on your Mac because it is not meant to be easily found.
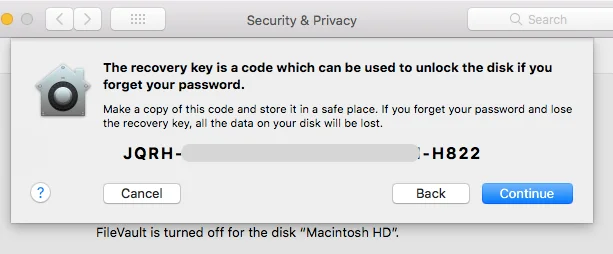
Your FileVault recovery key is the last line of defense for protecting your Mac. When you set up FileVault for the first time, the recovery key is displayed on the screen. You are warned that you will only see the recovery key once for security purposes. You have the option to save it to iCloud, take a screenshot, or write it down somewhere.
If you need the FileVault recovery key later, accessing it depends on how you saved it. If you chose iCloud, check your iCloud account. If you wrote it down or took a screenshot, you need to look for it.
If you are unable to locate your FileVault recovery key or your login password, you will be unable to recover the encrypted contents of your Mac.
How to unlock your Mac with a recovery key
Generating a recovery key can be an excellent way to improve your security. You can also use it to unlock your Mac and regain access to your Apple ID. Your recovery key will be a randomly generated 28-character code.
Before committing to this method, consider that the creation of a recovery key means your alternative account recovery method will be turned off. Additionally, you are entirely responsible for your recovery key, as Apple will not store it anywhere. You have to take note of it and save it somewhere you will not lose it and where no one else will have access to it.
To generate a recovery key on your Mac.
- Go to System Preferences > Apple ID > Account Details. You might need to enter your Apple ID password.
- Click Security.
- In the Recovery Key section, click Turn On.
- Click Use Recovery Key.
- Write down your recovery key and keep it in a safe place.
- Click Continue.
- Confirm your recovery key by entering it on the next screen.
To unlock your Mac with your recover key:
- Restart or log out of your Mac. You should see a login page prompting your password, along with the Shut Down, Restart, and Sleep options at the bottom.
- If you do not see a question mark in the password field, enter your password (up to three times). Otherwise, click on the question mark.
- Click “Restart and show password reset options.”
- Next, choose to enter your FileVault recovery key.
- Select a user for which you want to reset the password, then click Next.
- Enter your new password information, then click Next.
- When the password reset is completed, click Restart.
What to do if you’ve lost your FileVault recovery key
When you generate your recovery key, it is a good idea to print it out or write it down in several places. Give a copy to a family member or a friend you trust for safekeeping. Never share your key over messages or save them in your email to avoid breaches in case your account is hacked. Keep your recovery key in a secure location, and don’t save it within your devices.
That said, despite all the tips and warnings that Apple provides, it is nevertheless common for users to lose their recovery keys. Fortunately, you can easily create a new recovery key if you are logged in to your Apple ID with another device, such as your iPhone.
To do this:
- Sign in to your Apple ID account page at appleid.apple.com.
- Sign in with your password and trusted device.
- In the Sign-In and Security section, navigate to Recovery Key > Change Recovery Key.
If you are not signed with any other device or cannot access your Apple ID, you will not be able to create a new recovery key or regain the one you used. This means you will lose all access to your files and have to create a new Apple ID to use your devices.
How do I fix Filevault if it gets stuck?
As we said previously, you need to do a full backup of your essential files before turning off FileVault. If the following troubleshooting steps don’t work, you will have to wipe the computer and start again, so having a file backup will be a lifesaver.
Here are some FileVault troubleshooting tips:
- Is your Mac connected to power? If the Mac is not connected to a power source, FileVault decryption can quite often pause. So plug in your machine and see if that moves things along.
- Restart your Mac. This won’t have any adverse effects on your FileVault decryption process. Once you have restarted your Mac, FileVault will be in the exact state as it was before. But restarting your Mac may remove congestion in your system, lower CPU usage, and make things go a bit smoother.
- It can take a long time. In some cases, turning off FileVault can take as little as 10 minutes. In other cases, it can take a couple of hours. So, if decrypting has suddenly stopped, leave it be. It is most likely taking longer than usual.
Why you should be using FileVault on your Mac
It’s been said before, and it’s worth saying again: There is absolutely no upside to disabling FileVault. None whatsoever.
Having FileVault enabled is one of the best decisions you can make as a Mac owner. Here are a few reasons why.
FileVault makes your computer useless to thieves
If you’re unfortunate enough to be the victim of theft and someone swipes your Mac, anything on the machine is encrypted. The contents are, therefore, useless to thieves. If you have sensitive work files on there, for example, FileVault could save your job.
FileVault makes your personal information untouchable
We put everything on our laptops these days: files, photos, videos, bank statements, passwords, contact lists, and more. If anyone were to get hold of that information — such as a snooper — your life could be turned upside down in more ways than one.
It’s all about protection and peace of mind. Knowing that your files are safely tucked away from harm can remove a lot of unnecessary stress. The fact that Apple provides this amazing encryption tool for free is even more incredible.
The encryption of data in rest, in transit, and in use is the most effective defense against cybercriminal threats. As a built-in, easy-to-use, powerful security tool, FileVault brings state-of-the-art encryption technology to all Mac users. And while the encryption capacity of older Macs’ was not fully developed, new chips and new models have proven that Apple FileVault encryption is effective, has many benefits, and requires no special knowledge.