Everyone has the right to privacy. With so much of our personal lives on display for public consumption, it makes sense to want to button up certain aspects of your digital life to keep them safe.
Regardless of why you want to keep information private on your Mac, you can do so easily by password-protecting a folder, among other methods. Keep reading to learn how to password-protect a folder on a Mac.
How to securely lock files on your Mac
There are 2 routes for locking files and folders on your Mac. You can use the built-in option on the Mac itself. Or you can use a third-party encryption tool.

Break into your Mac? Mission impossible
We’ll show you how to use a third-party encryption tool, but the easiest way is to use the built-in option on the Mac. If you want to lock apps on the iPhone, we have a separate guide for that.
Create an encrypted disk image
Creating an encrypted disk image is a built-in method on a Mac, and it is arguably the easiest way to lock a folder. The process goes as follows:
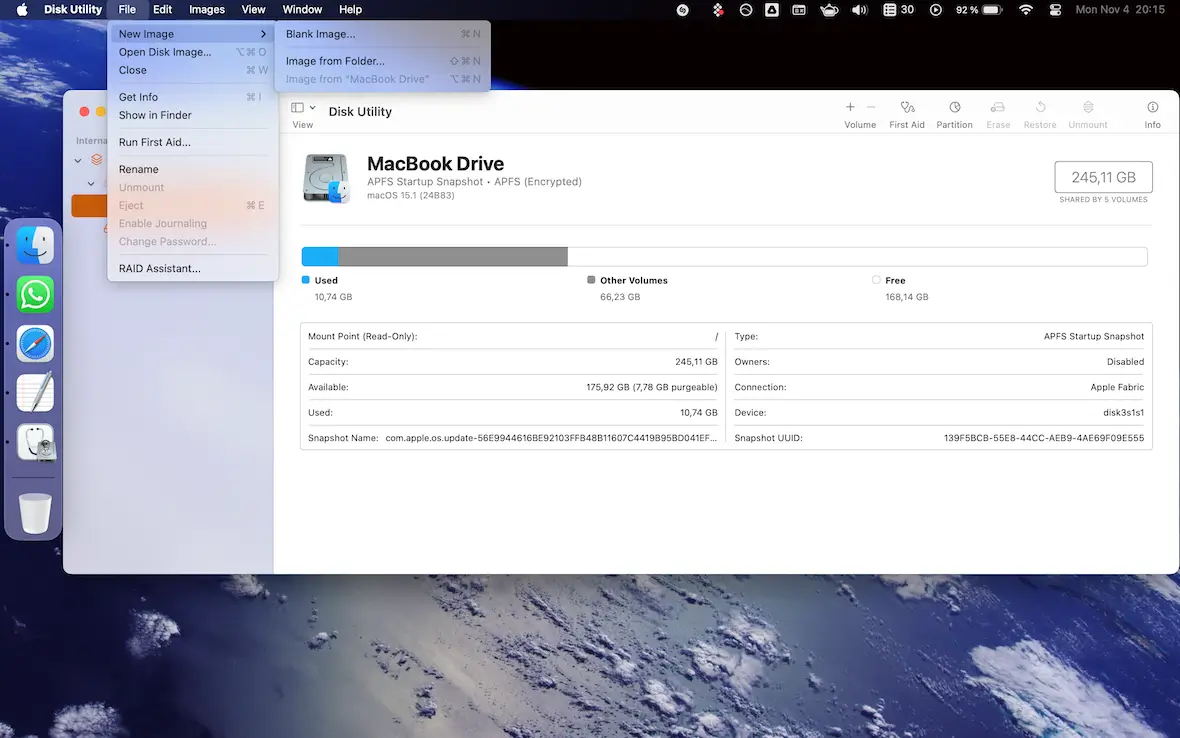
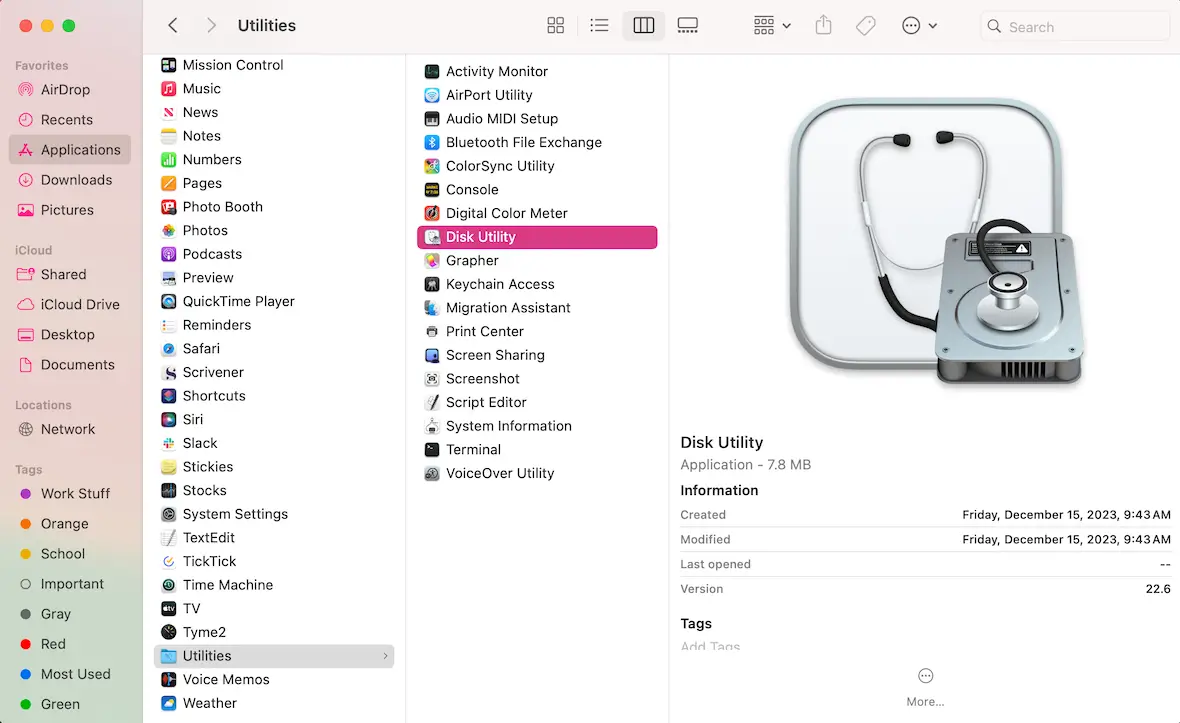
- Open Disk Utility. You can find it in the Applications > Utilities folder in Finder. Or open Spotlight and start typing Disk Utility.
- On Disk Utility, go to File > New Image > Image from Folder.
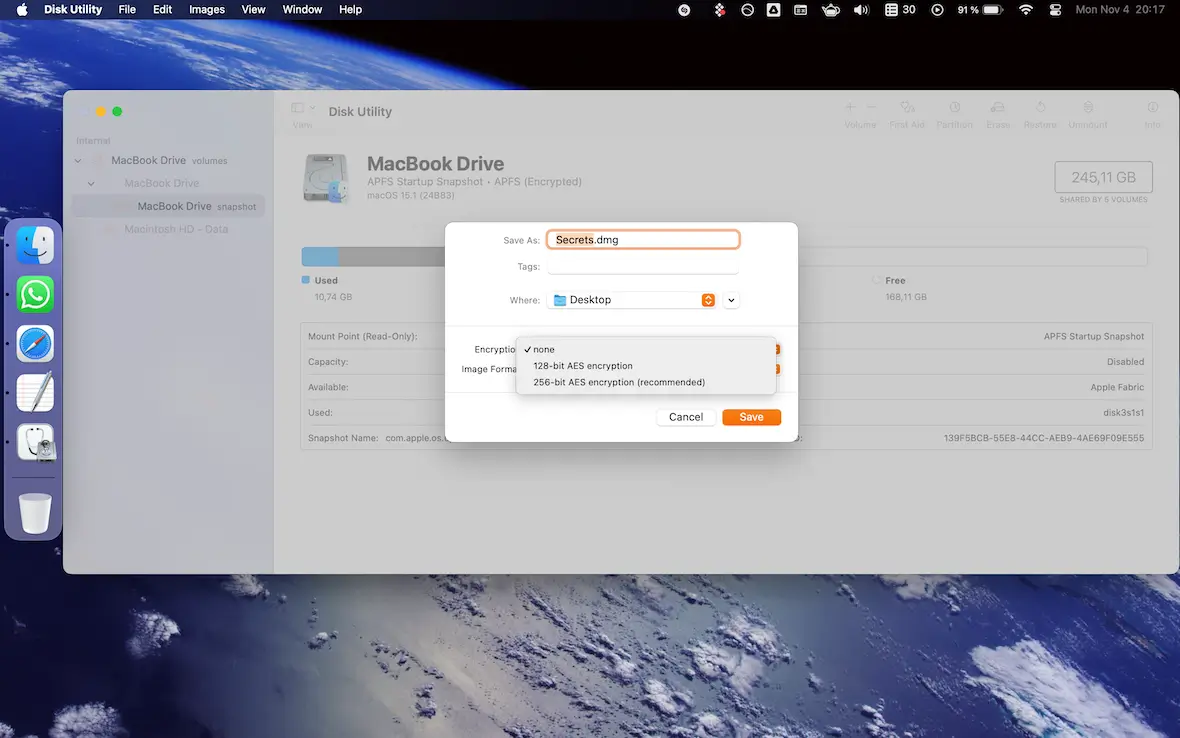
- Select the folder to encrypt and an encryption standard (256-bit is best).
- Set a strong password and select Save.
A DMG file will now be saved to your Mac. Double-clicking it will prompt a password prompt box to pop up. Unless the correct password is provided, the file cannot be cracked open, and the contents are encrypted.
Note that the original folder and files will still be on your computer unprotected. Disk Utility merely copies them.
Use a third-party encryption tool
The Disk Utility method is simple and straightforward. However, you may decide to use another encryption method. The only issue with using a third-party tool is that you have to be sure that the recipient also had the app to decrypt it. There are two viable options that we can recommend. One is BetterZip, which costs $24.95. You can get it on our Setapp.
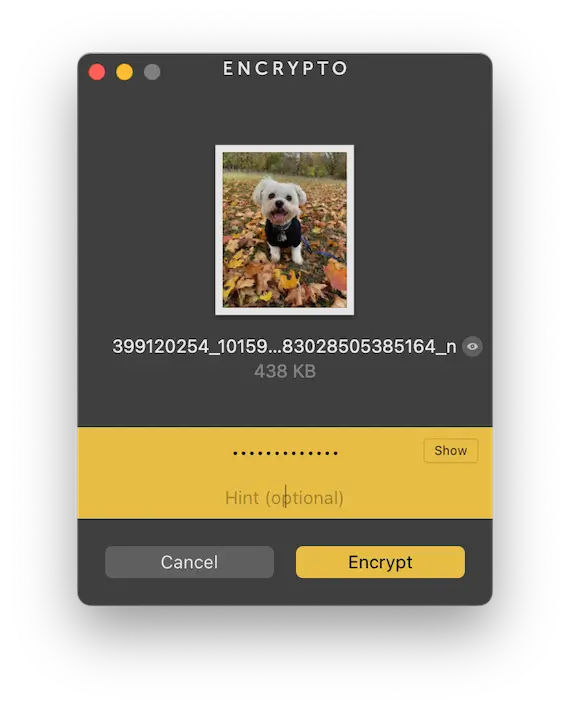
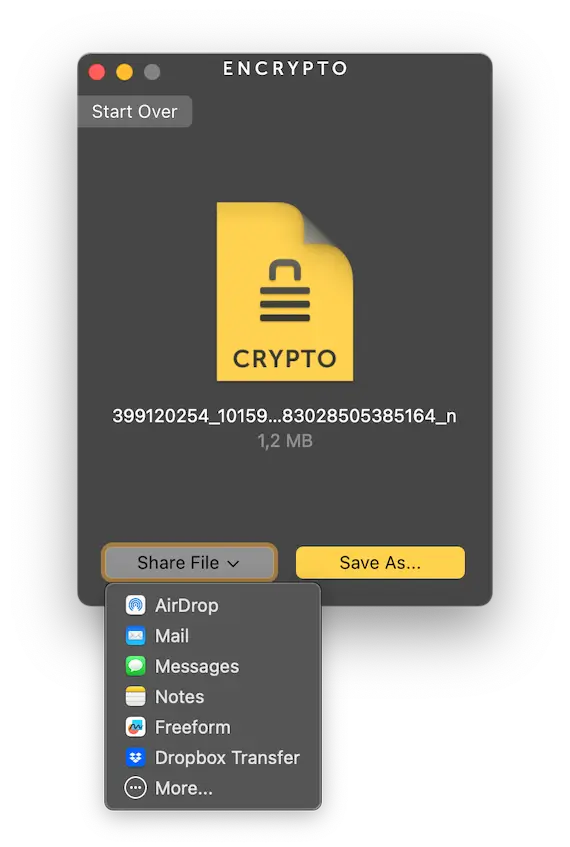
The other option is Encrypto, also owned by us. This one is completely free and available for macOS and Windows. After dragging your files into the window, it will be encrypted into the “crypto” file format. You can then share the file.
How can I password-protect a folder on macOS?
If you live in a house with other people, password-protecting your files and folders becomes a necessity. Learning how to put a password on a folder can keep your personal data safe from prying eyes and help protect you from identity theft.
Data breaches occur every day. By password-securing a folder, you could also protect your data against hackers. The following are a few ways you can password-protect a folder.
How to add a password to a folder using Disk Utility
While securing individual files makes sense, it’s also a good idea to secure an entire folder. That way, you can quickly move files in and out of it whenever you like without any tricky maneuvers.
The first way to protect a folder on a Mac is by using the built-in Disk Utility tool. The tool creates an archive file (.dmg) using AES encryption, which requires a password to open.
How to apply a password to a folder using Disk Utility:
- On a Mac, open Applications.
- Choose Utilities, Disk Utility.
- Choose File, New Image, and Image from Folder from the top menu.
- Select the folder you want to password-protect.
- Click Choose.
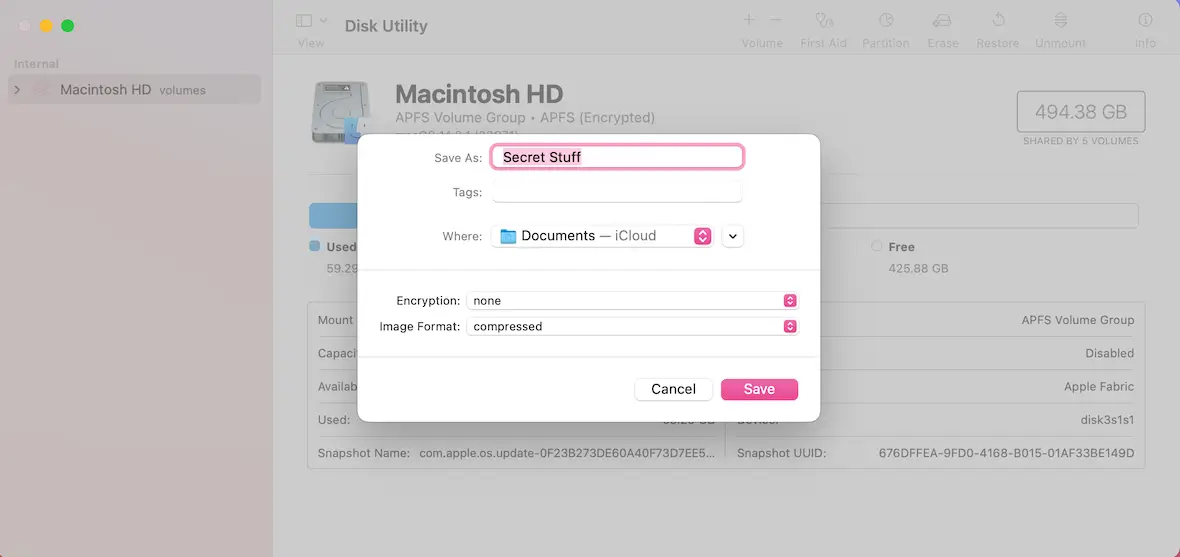
- Choose the location.
- Give the folder a name.
- Use the Encryption drop-down menu to choose your encryption level (128-AES or 256-AES).
- Enter a password.
- Verify the password (your Mac can create a password for you).
- Click Choose.
- Select the Image Format drop-down and select “read/write.”
- Click Save.
Disk Utility will encrypt your folder. Wait until it is done before closing the app. Click Done, and then you can close it.
Because macOS creates a new encrypted folder, you can delete the old one. To open your new folder, simply double-click it and enter the password you created.
How to secure a folder with a password using Encrypto
Encrypto is a free MacPaw app with increased versatility and more features than the built-in Disk Utility. You can download it for free on the App Store.
One of Encrypto’s best features is sending or sharing password-protected files with anyone with 256-AES encryption. You can also hide encrypted files so no one can see or delete them. You cannot do this with Disk Utility. Encrypto even works seamlessly between Mac and Windows machines.
This powerful program is easy to use, simply:
- Download and install Encrypto from the App Store.
- Open the app.
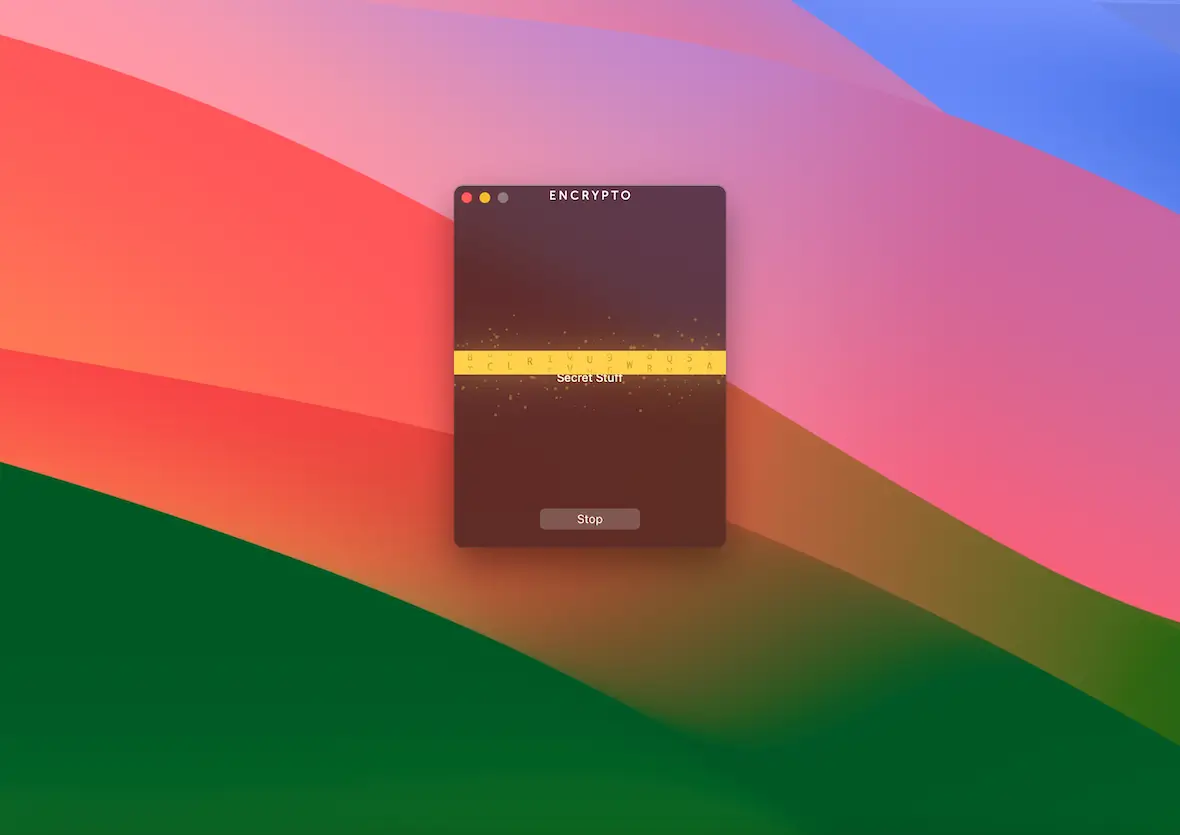
- Drop the files you want to password-protect in the yellow bar.
- Encrypto gets to work encrypting your files.
- Set a password.
- Set a password hint.
- Click Encrypt.
- Wait for it to finish.
Once Encrypto is done working, you can share or send the file using built-in macOS tools like messages, email, AirDrop, etc.
How to password-lock a folder with a Terminal command
Another way to password-lock a folder on a Mac is using Terminal commands. Terminal is like the old DOS operating system, and commands quickly get to the heart of the matter without any visual distractions. That said, you always want to be careful before using Terminal commands.
The following process turns your folder into an encrypted ZIP archive file. This method works well if you intend to share or send the password-protected file via email:
- On a Mac, go to Applications > Utilities > Terminal.
- Open Finder and locate the folder. CTRL-click and choose Get Info.
- Copy the Where location to your clipboard (CMD+C).
- Back in Terminal, type cd and a space.
- Paste (CMD+V) the path you copied above, and click Return.
- This will select that location.
- Type ls and click Return.
- Confirm access to that location when the Terminal asks for it.
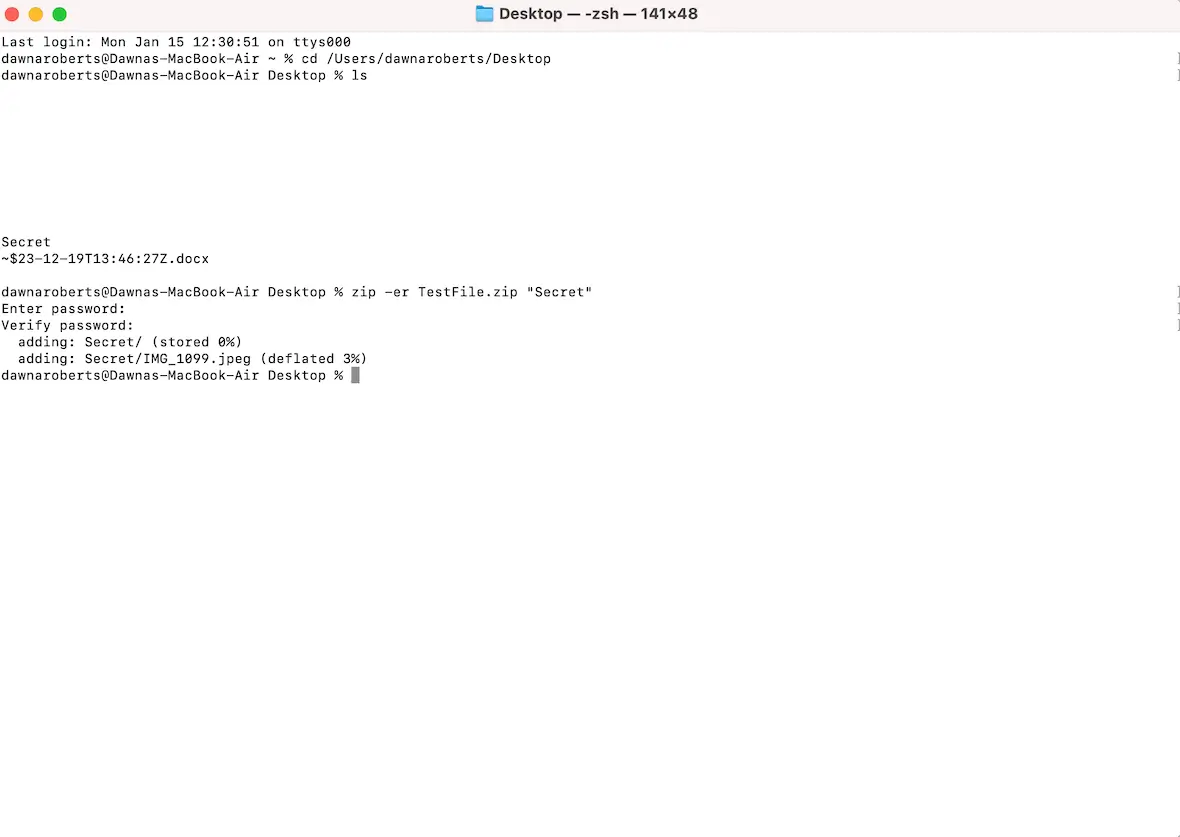
- Type zip -er PasswordProtectedFiles.zip “Secret”
- Above “PasswordProtectedFiles” is the name you want to give your new file. Change it to whatever you like. Just ensure that it includes the .zip at the end.
- Where we have “Secret,” change it to the name of the folder that you want to password-protect. (Ours is called Secret.)
- Click Return.
- Enter the password you want to use.
- Verify the password.
You will now see an archive folder (ZIP) in the exact location of the original file. Double-click it, and a pop-up box will ask you to enter the password. The file is now safe to send.
What is the difference between password protection and encryption?
There’s a very simple difference between password protection and encryption.
Password protection puts a protective layer around a file or a folder. It stops unauthorized eyes from accessing that file or folder unless they have the correct password. Once the correct password has been entered, then the protective layer peels away to reveal the contents of that file or folder.
Encryption, on the other hand, is a totally different beast. A computer algorithm scrambles the content of the file or folder into an unintelligible mess. The algorithm is extremely complicated, so the chance of being able to break the encryption and put the message back together again is virtually impossible.
So, even if the encrypted data is exposed, no one will be able to read it. The person would need a decryption key to put the file or folder back into a readable state.
Why you might want to lock folders on Mac
macOS has a lot of solid security features, such as FileVault, which is usually more than enough to protect files from outside interference. So, why would you need to lock folders on your device instead of simply relying on FileVault, hiding them, or using a hider app?
Your Mac login password reveals everything
The encryption on Mac provided by FileVault is designed to prevent files from being tampered with from the computer while the computer is powered off. But if someone knows your Mac’s login details, everything is laid bare to read or steal.
It stops casual snoopers
If you share your MacBook with your spouse, parents, siblings, roommates, etc., this scenario is for you. Even if you do your best to log out when you’re finished, there’s a chance that your files will be looked at, your documents read, your pictures browsed through, and your passwords used. Locking your private files inside a Mac folder stops another user from casually violating your privacy.
It stops you from accidentally deleting the folder
Locked folders cannot be deleted. So, if you’re worried that a folder on your hard drive could possibly be deleted accidentally, you can lock it. The delete function will then be disabled.
Things to keep in mind when you lock a folder with a password
As good as password-protecting your files sounds, password-protecting comes with limitations and some dangers. Here are some things to consider before locking up all your data.
Don’t lose your password
Once you password-protect your folder, the password cannot be retrieved. If you lose it or forget it, you may lose access to those files forever. Be sure to keep your password in a safe location (preferably a password vault). Always back up your files before password-protecting and store them offline on a disk that can be locked in a safe.
Consider the risk of deletion
If you use Disk Utility, anyone with access to your computer could find and delete your protected files. They are not hidden from view. If you use third-party tools like Encrypto, you could hide them from others so they don’t even know they are on your Mac.
Consider using additional security measures
So, you have FileVault installed, and you have your files encrypted and locked with Disk Utility or one of the third-party apps. But is there anything else you can do?
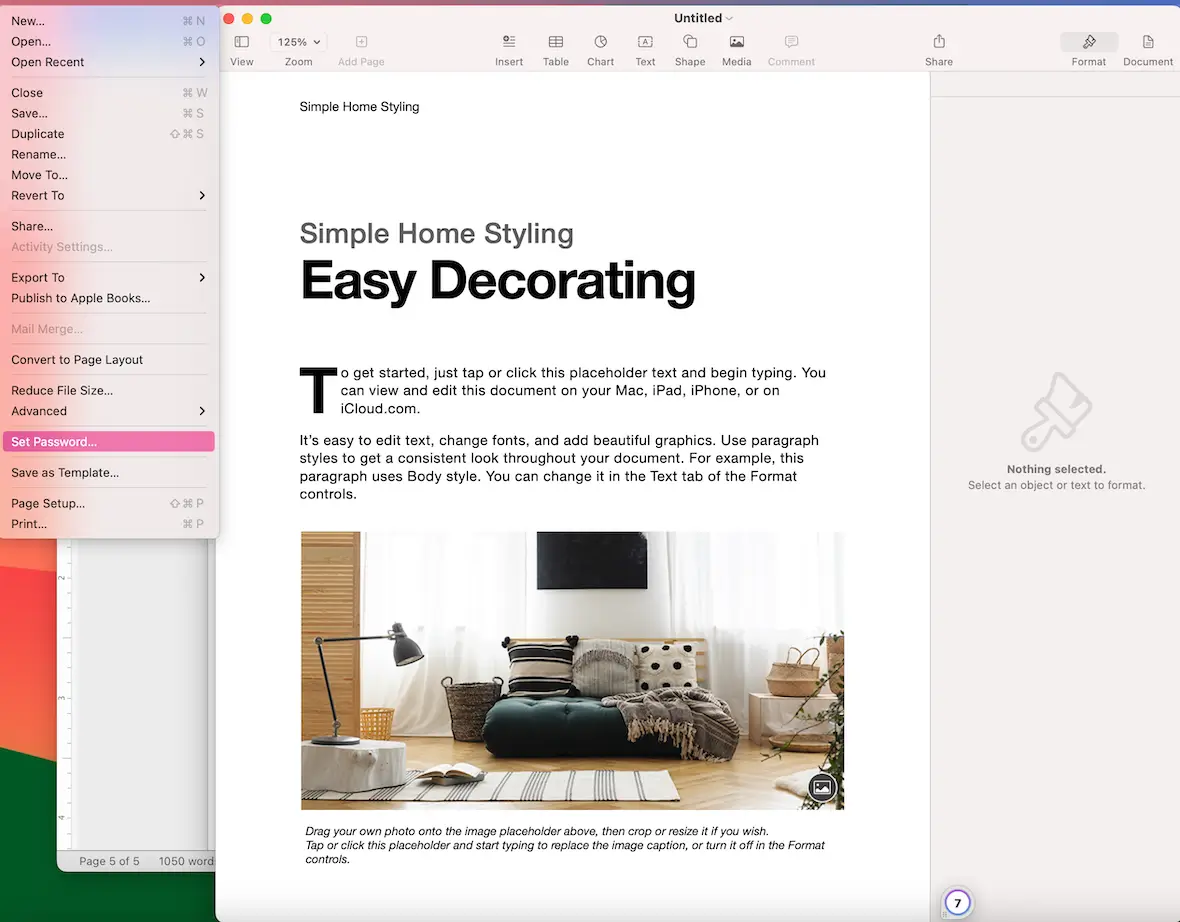
- See if the files inside the encrypted folder also have their own encryption or hiding function. For example, macOS Pages has its own encryption.
- If the encryption protocol supports it, enable 2-factor authentication.
- Move the encrypted files to removable storage such as a USB stick.
- If you prefer encrypted cloud storage, look at Sync.com and Proton Drive.
As you can see, the built-in FileVault doesn’t protect files if someone manages to get into the Mac by entering the password. It only stops people from trying to bypass the password to extract the files.
Using Disk Utility or a third-party tool like Encrypto or BetterZip provides an extra layer of security to your folders and files. So, even if someone does manage to gain access to your Mac, the files and folders will still be inaccessible to them.
Now that you have learned how to apply a password to a folder, you have one more tool in your cybersecurity toolbelt to keep you and your private information safe and secure.
This is an independent publication, and it has not been authorized, sponsored, or otherwise approved by Apple Inc. Mac and Disk Utility are trademarks of Apple Inc.